目录
1、设置访问外网:
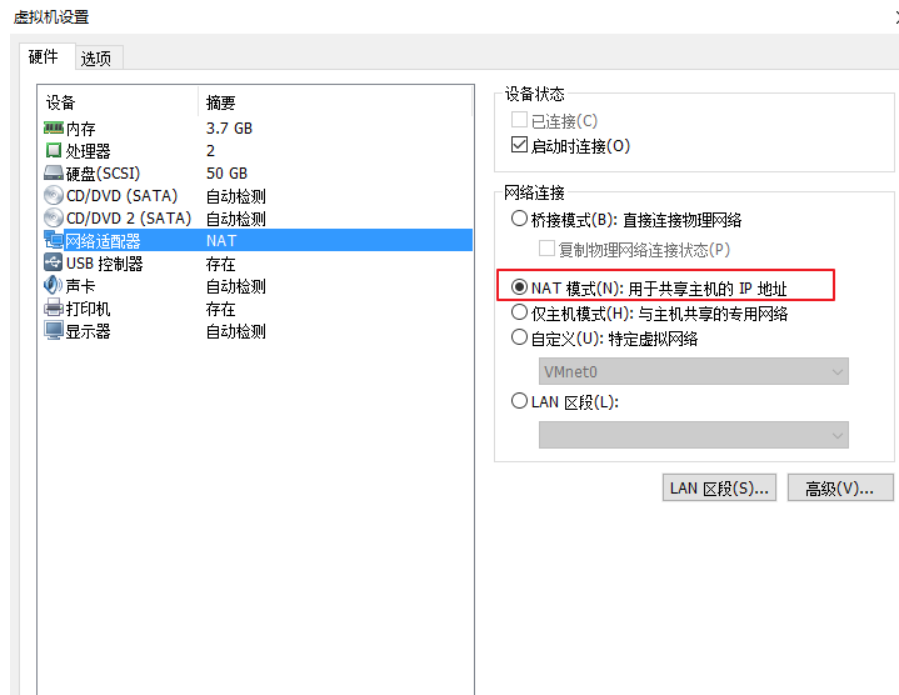
1)菜单栏,虚拟机-》设置,配置虚拟机网络适配器,选择NAT模式:
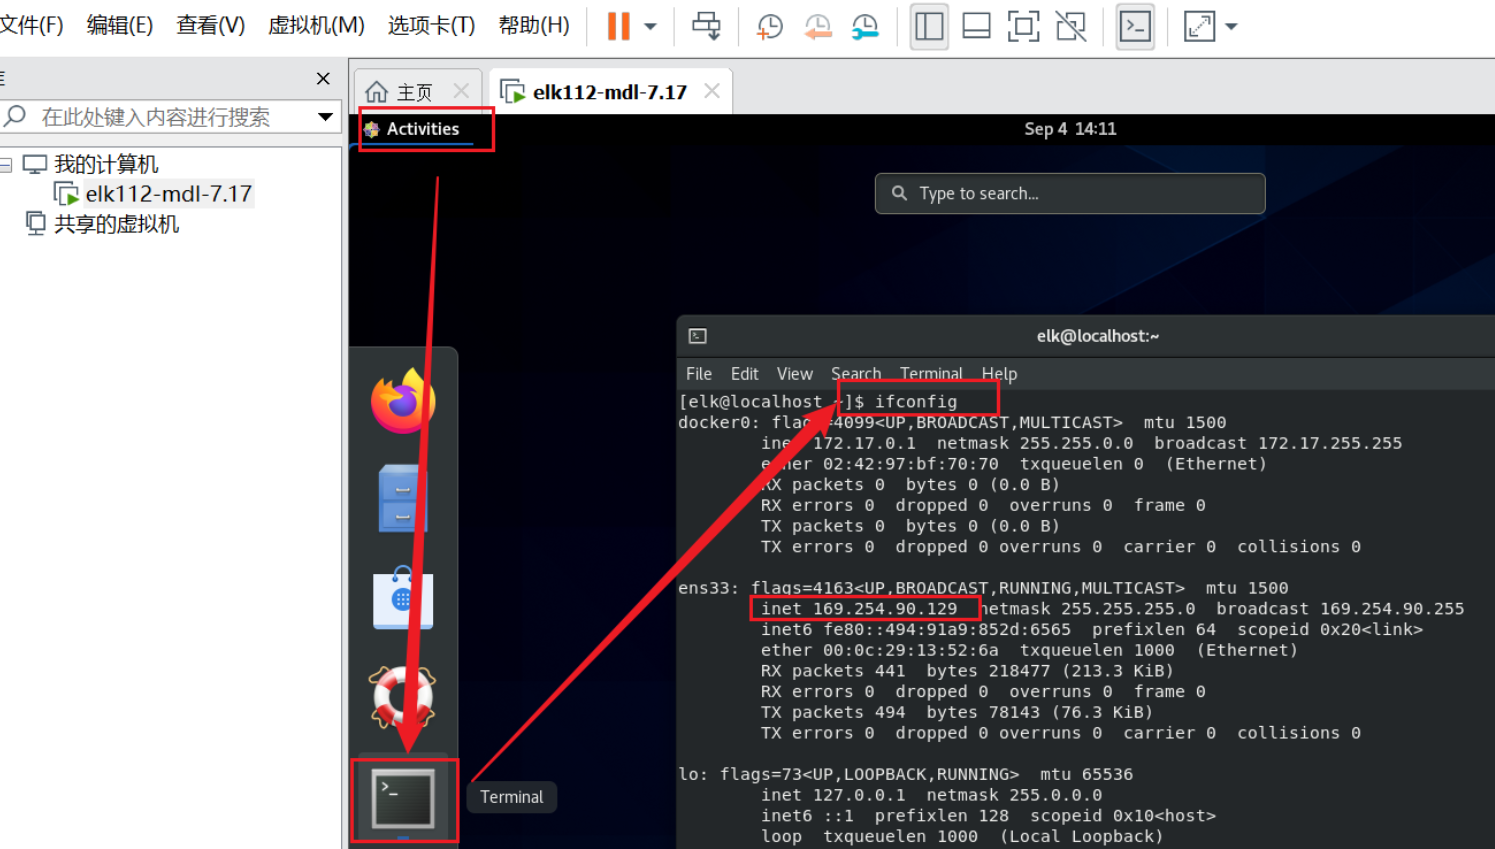
登录 debian ,打开终端,输入ifconfig,得出IP地址是:169.254.90.129:
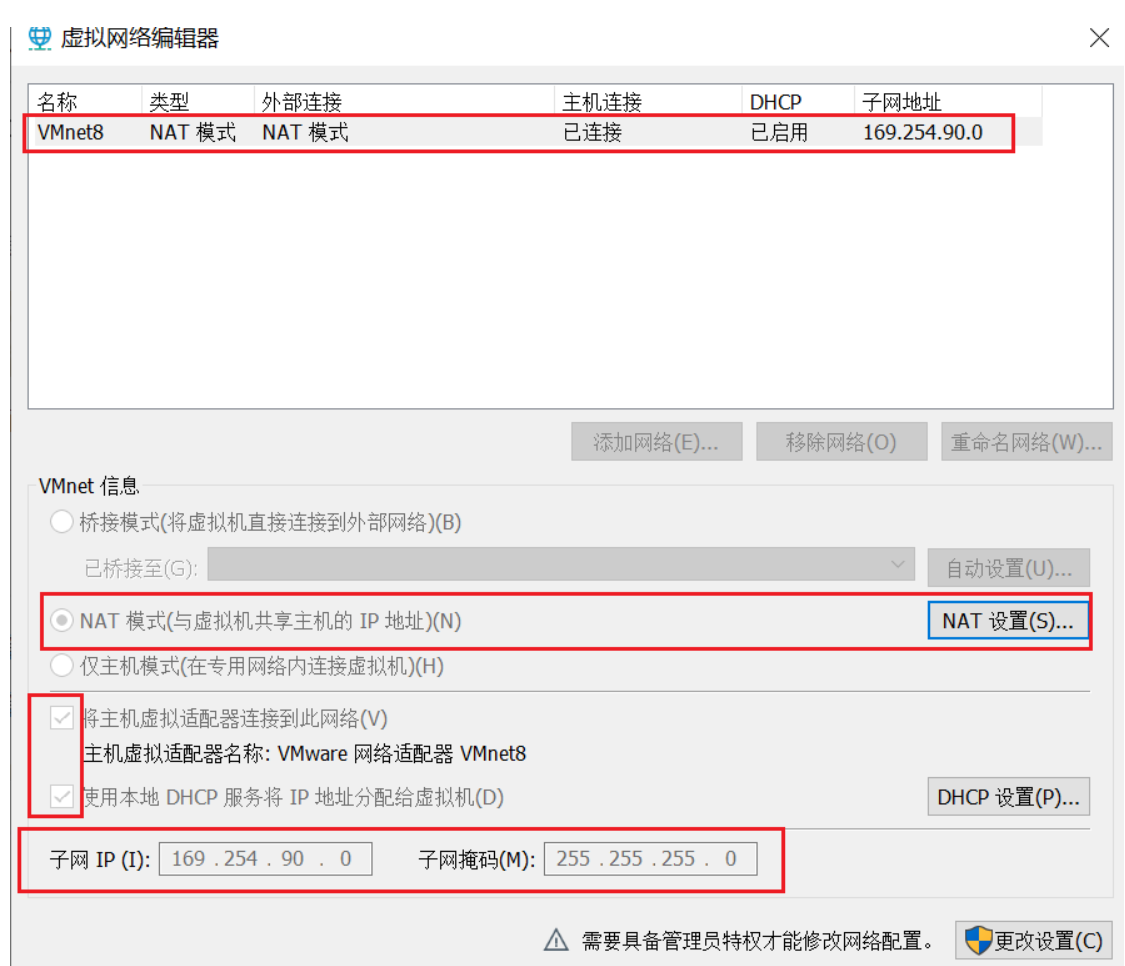
在编辑->虚拟机网络编辑器->更改设置:
照如下配置修改 :修改子网IP为 169.254.90.0,子网掩码为 255.255.255.0
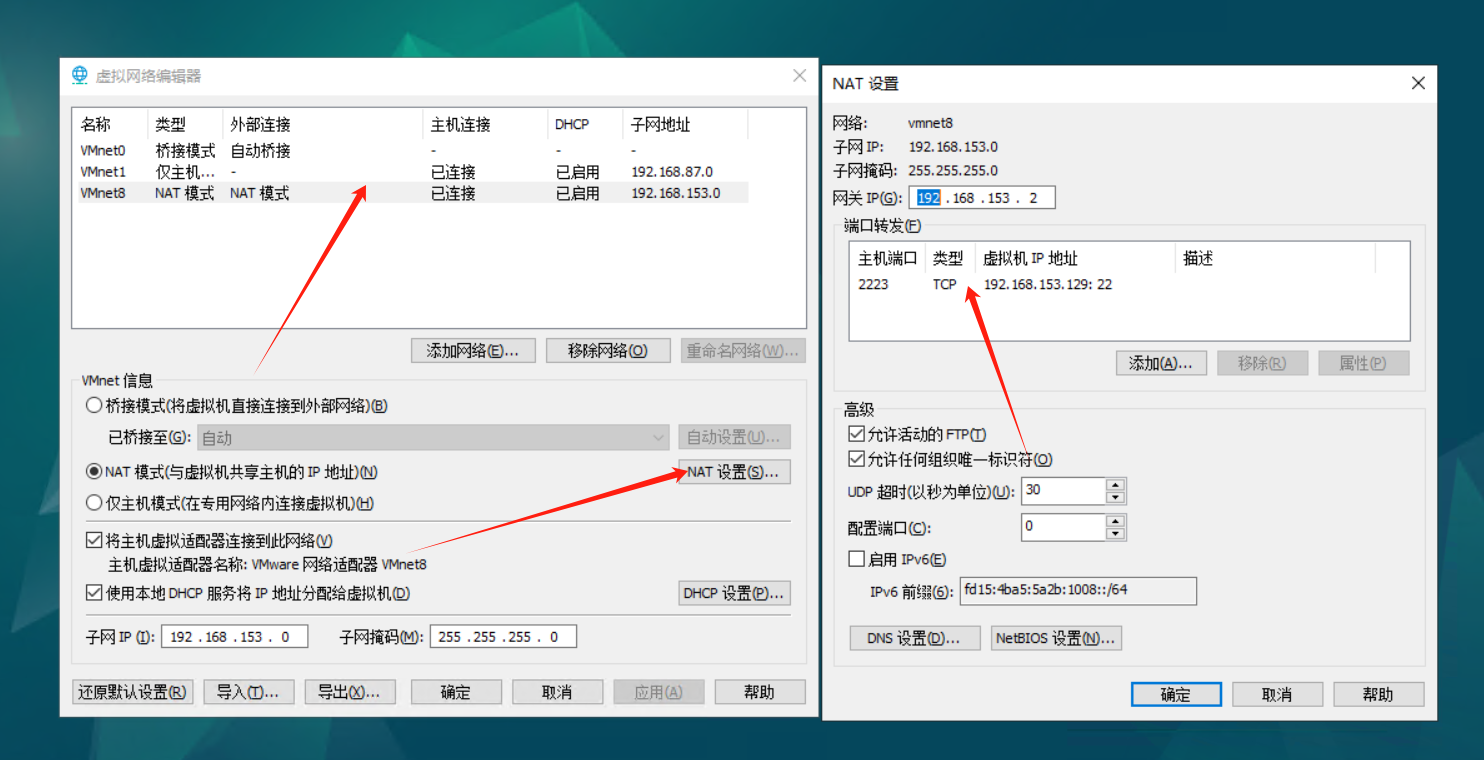
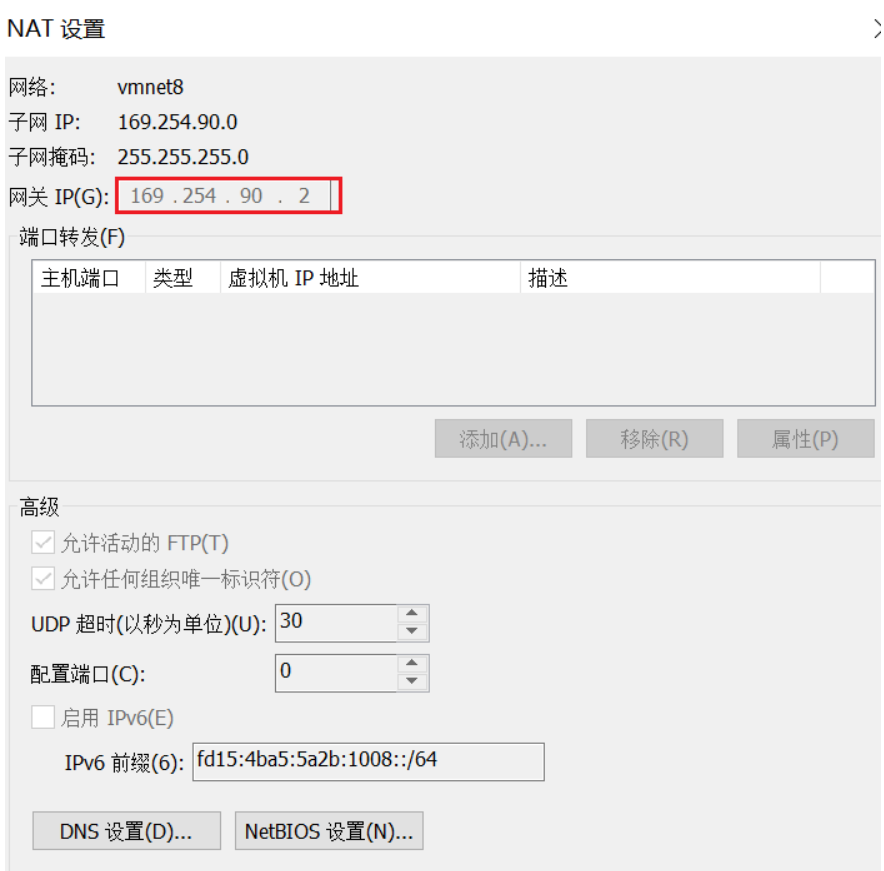
点 NAT设置,修改网关为 169.254.90.2:
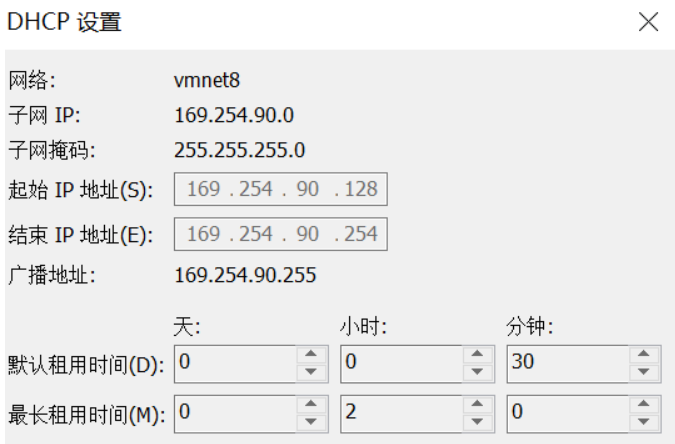
返回到虚拟机网络编辑器,点击 DHCP设置,设置IP地址范围,即虚拟机可设置的固定IP范围:
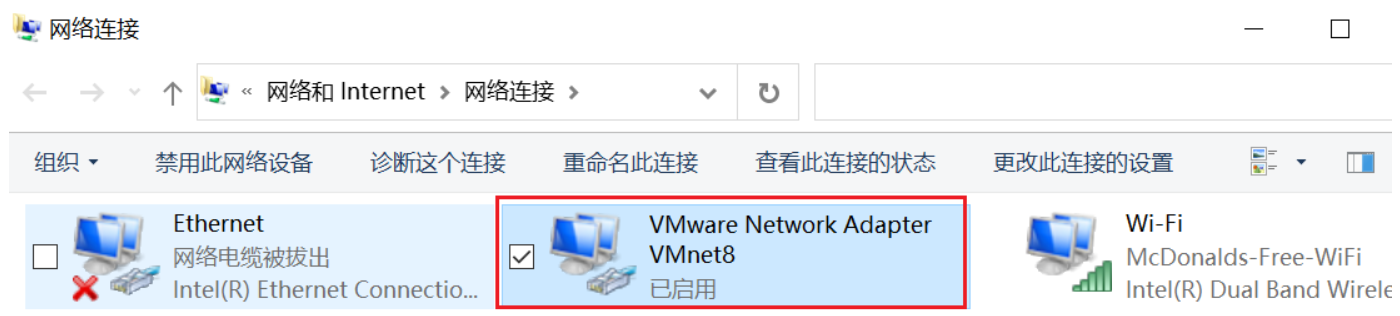
在windows系统中配置 VMWare的虚拟网卡:
第一步:打开网络和共享中心 ,选择更改适配器选项,选中VMnet8,右键选择属性打开:
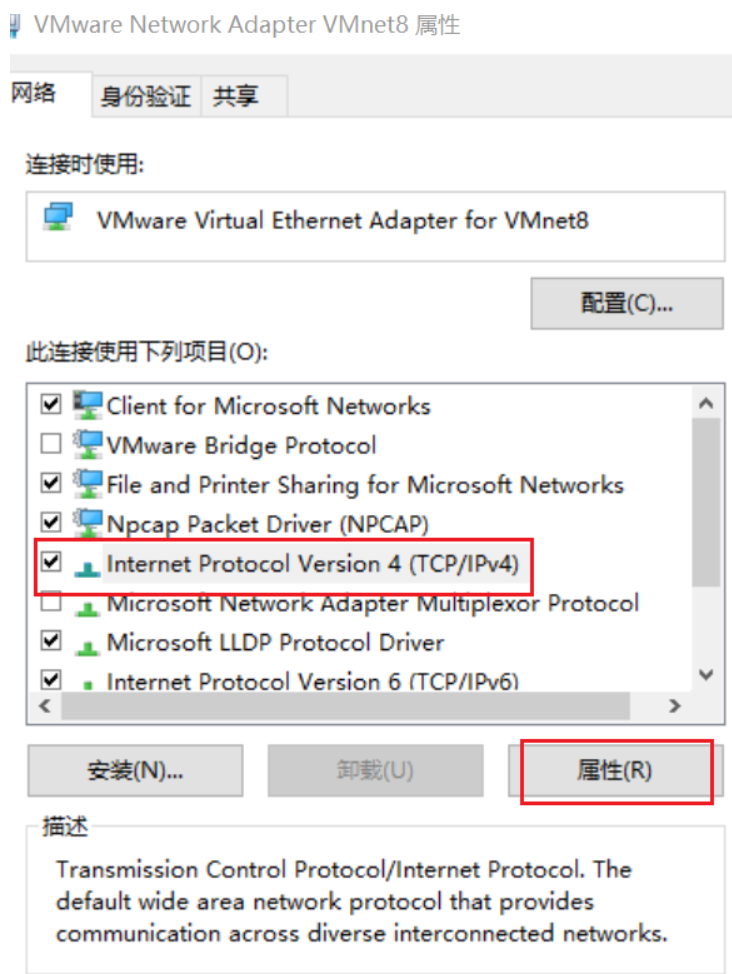
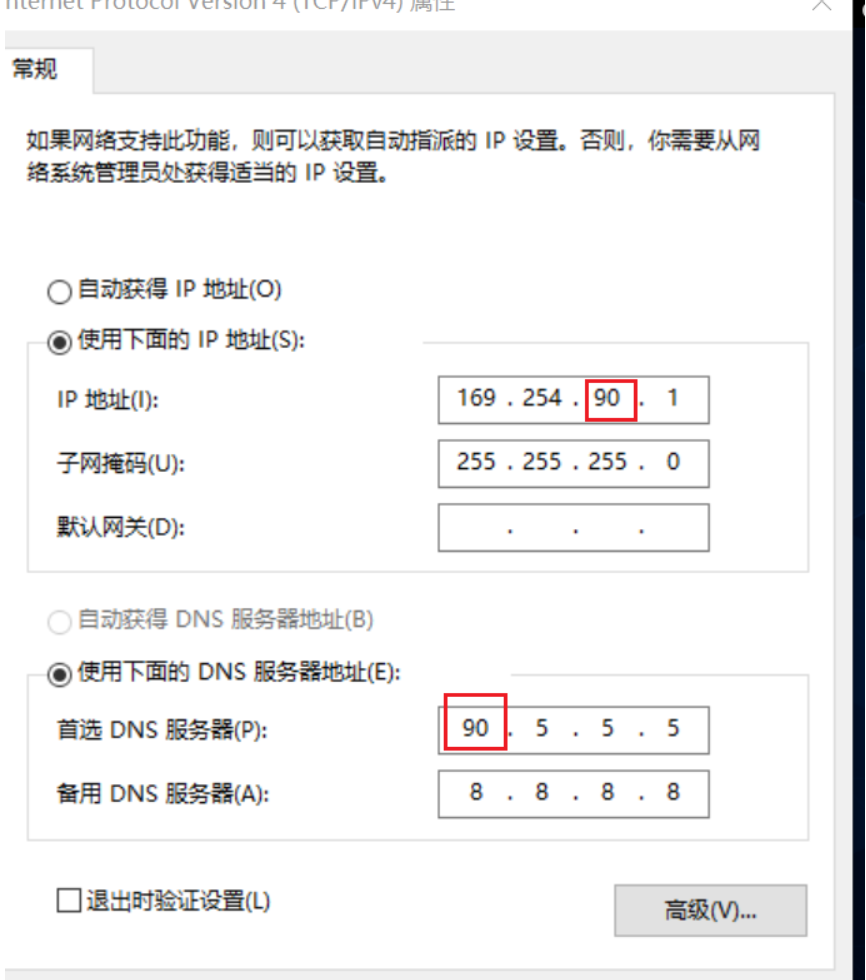
点属性,把默认的【自动获取IP地址】改成【使用下面的IP地址/DNS服务器地址】,具体修改仿照参照:
配置完成后,重启reboot,测试网络:
ping www.baidu.com
2、设置本地网络:
创建或编辑网络配置文件,例如 /etc/systemd/network/10-eth0.network:
sudo nano /etc/network/interfaces配置使用 DHCP 的接口:
# This file describes the network interfaces available on your system
# and how to activate them. For more information, see interfaces(5).

source /etc/network/interfaces.d/*

# The loopback network interface
auto lo
iface lo inet loopback

# The primary network interface
auto ens33
iface ens33 inet dhcp
重启网络:
sudo systemctl restart systemd-networkd3、安装 OpenSSH 服务器
首先,确保 OpenSSH 服务器已安装:
sudo apt-get update
sudo apt-get install openssh-server
启动 SSH 服务并设置其为开机自启动:
sudo systemctl start ssh
sudo systemctl enable ssh
检查 SSH 服务的状态以确保其正常运行:
sudo systemctl status ssh输出应类似于:
● ssh.service - OpenBSD Secure Shell server
     Loaded: loaded (/lib/systemd/system/ssh.service; enabled; preset: enabled)
     Active: active (running) since Fri 2024-06-14 19:30:00 CST; 1min ago
   Main PID: 1234 (sshd)
      Tasks: 1 (limit: 4915)
     Memory: 2.4M
        CPU: 30ms
     CGroup: /system.slice/ssh.service
             └─1234 /usr/sbin/sshd -D
编辑 /etc/ssh/sshd_config 文件以配置 SSH 服务器选项:
sudo nano /etc/ssh/sshd_config设置ssh端口和启用root登录:
# This is the sshd server system-wide configuration file.  See
# sshd_config(5) for more information.

# This sshd was compiled with PATH=/usr/local/bin:/usr/bin:/bin:/usr/games

# The strategy used for options in the default sshd_config shipped with
# OpenSSH is to specify options with their default value where
# possible, but leave them commented.  Uncommented options override the
# default value.

Include /etc/ssh/sshd_config.d/*.conf

# 修改 SSH 访问端口
Port 2222
#AddressFamily any
#ListenAddress 0.0.0.0
#ListenAddress ::

#HostKey /etc/ssh/ssh_host_rsa_key
#HostKey /etc/ssh/ssh_host_ecdsa_key
#HostKey /etc/ssh/ssh_host_ed25519_key

# Ciphers and keying
#RekeyLimit default none

# Logging
#SyslogFacility AUTH
#LogLevel INFO

# Authentication:

#LoginGraceTime 2m
# 允许 root 登录
PermitRootLogin yes
#StrictModes yes
#MaxAuthTries 6
#MaxSessions 10

PubkeyAuthentication yes

# Expect .ssh/authorized_keys2 to be disregarded by default in future.
#AuthorizedKeysFile	.ssh/authorized_keys .ssh/authorized_keys2

#AuthorizedPrincipalsFile none

#AuthorizedKeysCommand none
#AuthorizedKeysCommandUser nobody

# For this to work you will also need host keys in /etc/ssh/ssh_known_hosts
#HostbasedAuthentication no
# Change to yes if you don't trust ~/.ssh/known_hosts for
# HostbasedAuthentication
#IgnoreUserKnownHosts no
# Don't read the user's ~/.rhosts and ~/.shosts files
#IgnoreRhosts yes

# To disable tunneled clear text passwords, change to no here!
# 允许密码认证
PasswordAuthentication yes
#PermitEmptyPasswords no

# Change to yes to enable challenge-response passwords (beware issues with
# some PAM modules and threads)
KbdInteractiveAuthentication no

# Kerberos options
#KerberosAuthentication no
#KerberosOrLocalPasswd yes
#KerberosTicketCleanup yes
#KerberosGetAFSToken no

# GSSAPI options
#GSSAPIAuthentication no
#GSSAPICleanupCredentials yes
#GSSAPIStrictAcceptorCheck yes
#GSSAPIKeyExchange no

# Set this to 'yes' to enable PAM authentication, account processing,
# and session processing. If this is enabled, PAM authentication will
# be allowed through the KbdInteractiveAuthentication and
PasswordAuthentication yes
# PAM authentication via KbdInteractiveAuthentication may bypass
PermitRootLogin yes
# If you just want the PAM account and session checks to run without
PasswordAuthentication yes
# and KbdInteractiveAuthentication to 'no'.
UsePAM yes

#AllowAgentForwarding yes
#AllowTcpForwarding yes
#GatewayPorts no
X11Forwarding yes
#X11DisplayOffset 10
#X11UseLocalhost yes
#PermitTTY yes
PrintMotd no
#PrintLastLog yes
#TCPKeepAlive yes
#PermitUserEnvironment no
#Compression delayed
#ClientAliveInterval 0
#ClientAliveCountMax 3
#UseDNS no
#PidFile /run/sshd.pid
#MaxStartups 10:30:100
#PermitTunnel no
#ChrootDirectory none
#VersionAddendum none

# no default banner path
#Banner none

# Allow client to pass locale environment variables
AcceptEnv LANG LC_*

# override default of no subsystems
Subsystem	sftp	/usr/lib/openssh/sftp-server

# Example of overriding settings on a per-user basis
#Match User anoncvs
#	X11Forwarding no
#	AllowTcpForwarding no
#	PermitTTY no
#	ForceCommand cvs server
3、设置端口转发(如果使用 NAT 模式)
回到vmawre界面,点击编辑-虚拟网络编辑器: